To start a sunglasses business, you will need to have a strong understanding of the market and what type of sunglasses are in demand. You will also need to identify a niche within the market and build a brand around that niche. Once you have your foundation in place, you can start to source products and build out your online store.
Finally, you will need to generate traffic to your store through marketing and advertising.
- Research the market for sunglasses
- Determine what types of sunglasses are in demand and where your target market purchases their sunglasses
- Develop a business plan for your sunglasses business
- Include start-up costs, marketing strategies and projected sales figures
- Obtain financing for your business if needed
- You may need to secure a small business loan or invest personal funds into the business
- Find a location for yoursunglasses store or kiosk
- Consider high traffic areas such as malls, beach areas or downtown shopping districts
- 5 purchase inventory for your store
- Select a variety of styles and brands of sunglasses to appeal to different customers
- Order enough inventory to last several months, as it can take time to build up customer traffic
- 6 Set up shop ! Decorate your store in a manner that reflects the type of merchandise you sell
- Install display cases , racks or shelving to showcase your products
- 7 Promote your new business! Utilize marketing strategies such as social media , online advertising , fliers or newspaper ads to generate interest in your store among potential customers
How Much Money Do You Need to Start a Sunglasses Business
Starting a sunglasses business can be a great way to tap into the ever-growing fashion industry. But how much money do you need to get started? The answer may surprise you.
With as little as $100, you can start your very own sunglasses business. Of course, there are certain costs that you’ll need to factor in, such as the cost of inventory and shipping. But if you’re willing to put in the work, starting a successful sunglasses business is definitely within reach.
Of course, if you want to go the traditional route and open up a brick-and-mortar store, you’ll need more start-up capital. But thanks to the internet, it’s now easier than ever to reach customers all over the world without breaking the bank.
So if you’re looking to get into the fashion industry, starting a sunglasses business is a great option.
With some hard work and dedication, you can make it big without spending a fortune.
Is Sunglasses Business Profitable
Sunglasses are a must-have accessory for many people, and as such, the sunglasses business can be very profitable. There are a few things to keep in mind when starting a sunglasses business, such as the type of sunglasses you will sell, your target market, and your pricing strategy.
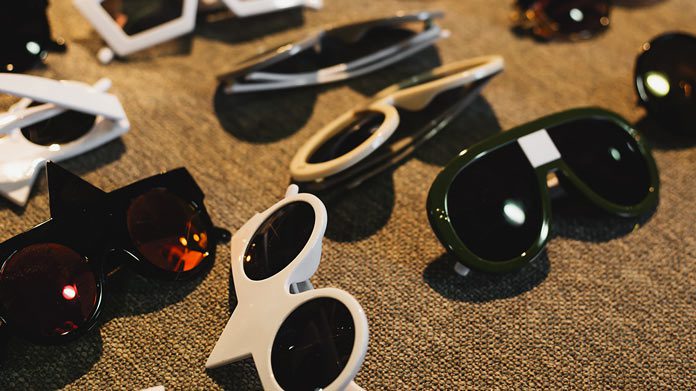
When it comes to the type of sunglasses you will sell, it is important to offer a variety of styles to appeal to different customers.
For example, some people may prefer aviator-style sunglasses while others may prefer more traditional looking shades. You should also carry a range of brands so that customers have plenty of options to choose from.
Your target market will largely dictate the price point of your sunglasses.
If you are selling designer shades, then your prices will be higher than if you were selling more affordable options. It is important to find a balance between offering competitive prices and making a profit on your sales.
Finally, consider running promotions or discounts on your sunglasses to help boost sales.
For example, you could offer buy one get one free deals or percentage off discounts during certain times of the year. By offering attractive deals on your sunglasses, you can increase traffic to your store or website and boost profits.
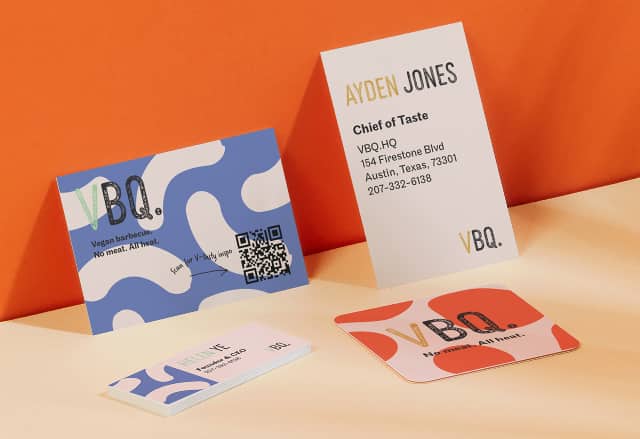
Create Your Own Sunglasses With Logo
Are you looking for a unique and stylish way to promote your brand or company? Custom sunglasses with your logo are a great way to do just that! Not only are they practical and useful, but they’re also a fun and trendy accessory.
There are many different companies that offer custom sunglass printing services, so finding one should be easy. Once you’ve found a few options, it’s time to start designing your perfect pair of shades! If you don’t have any design experience, don’t worry – most companies will have someone on staff who can help you create a great looking logo.
Once your design is complete, all that’s left is to choose the style of sunglasses you want. There are lots of different styles to choose from, so take your time and pick the perfect pair for your brand or company. After that, it’s just a matter of waiting for your custom sunglasses to arrive – and then enjoy showing them off to everyone!
How To.Become an Eyewear Designer
If you love fashion and want to design your own line of eyewear, becoming an eyewear designer may be the perfect career for you. Here’s what you need to know about how to become an eyewear designer:
1. Get a degree in fashion design or a related field.
If you want to become an eyewear designer, it’s important to get a solid foundation in fashion design. You can do this by getting a bachelor’s degree in fashion design or a related field like merchandising or textile science. During your studies, take classes that focus on accessory design, since this will give you specific knowledge about designing eyewear.
2. Start your own line or work for an existing brand. Once you have your degree, you can either start your own line of eyewear or work for an existing brand as a designer. If you decide to start your own business, you’ll need to handle everything from product development and marketing to sales and customer service.
Working for an existing company is a great way to get started in the industry and learn the ropes before striking out on your own.
3. Keep up with trends and develop new ideas. As an eyewear designer, it’s important to stay up-to-date on the latest trends so that you can create unique and stylish designs that will appeal to customers.
You should also be constantly thinking of new ideas for glasses so that your products always stand out from the competition. Attend trade shows, read industry publications, and follow trendsetters on social media to make sure you’re always ahead of the curve when it comes to Eyewear Design Trends .
Sunglasses Small Business
As the weather warms up, many of us are looking forward to spending more time outdoors. But while we enjoy the sunshine, it’s important to protect our eyes from its harmful UV rays. That’s why sunglasses are a must-have for anyone spending time in the sun.
If you’re running a small business, sunglasses can be a great promotional product to hand out to customers and employees. They’ll appreciate the gesture, and you’ll get some valuable branding exposure every time they wear them.
There are a few things to keep in mind when choosing sunglasses for your business.
First, make sure they offer adequate UV protection. Second, try to choose styles that will appeal to your target audience. And third, don’t forget about branding!
Make sure your logo or company name is prominently displayed on the glasses so people will always know who gave them their favorite shades.
Sunglasses make a great promotional product for any small business – they’re useful, stylish, and affordable. So don’t wait until summertime to start handing them out!
How to Manufacture Sunglasses
How to Manufacture Sunglasses
Sunglasses are a type of protective eyewear designed to reduce glare from the sun and other bright light sources. They can also provide protection from ultraviolet (UV) radiation.
Sunglasses are typically made from one or more pieces of tinted glass or plastic, held in place by a frame.
The first step in manufacturing sunglasses is creating the lens. The lens is made from either glass or plastic, and is then cut to the desired shape and size.
Next, the frame is created. The frame is usually made from metal or plastic, and must be strong enough to support the lens without breaking. Once the frame is complete, it is attached to the lens using special screws or hinges.
Finally, any decorative elements, such as logos or straps, are added to the sunglasses.
How to Get Sunglasses Manufactured
Are you looking to start your own sunglasses line? Or maybe you just have a great idea for a new style of shades and you’re looking to get them manufactured. Either way, there are a few things you need to know before getting started.
Here’s a quick guide on how to get sunglasses manufactured:
1. Find a reputable manufacturer. This is probably the most important step in the process.
You want to find a company that has experience manufacturing sunglasses and that has a good reputation. A quick Google search will help you find some options. Once you’ve found a few manufacturers, reach out and get quotes from each one.
2. Decide on your design. This is where your creativity comes into play. You need to come up with a design for your sunglasses that is both unique and marketable.
If you’re not sure where to start, there are plenty of online resources and even software programs that can help you with the design process.
3. Choose your materials carefully . The type of material you use for your sunglasses will impact both the quality and the price of your finished product .
Do some research on different types of materials used for sunglasses and decide which would be best for your particular design .
4 . Get samples made .
Once you’ve settled on a manufacturer and chosen your design , it’s time to get some samples made . This will give you an opportunity to see how your glasses look and feel in person , as well as make any necessary tweaks to the design before going into full production .
5 . Start production ! After everything looks good with the samples , it’s time to start producing your glasses en masse! Your manufacturer will walk you through the rest of this process so all that’s left for you to do is sit back and wait for those shiny new shades to arrive at your doorsteps!
Sunglasses Business Names

Are you looking for the perfect name for your new sunglasses business? Look no further! Here are some great options to consider:
1. “Sunglasses” – This is a simple, straightforward name that tells customers exactly what you sell. Plus, it’s easy to remember and pronounce.
2. “Shades of Fun” – This catchy name conveys the fun and carefree attitude that comes with wearing sunglasses.
It’s also easy to remember and spell.
3. “The Sunglass Shack” – A play on words, this name is both clever and descriptive. It’s sure to stand out from the crowd and be remembered by customers.
4. “Sunny Days Ahead” – This optimistic name suggests that wearing sunglasses will lead to good times ahead. It’s cheerful and positive, making it an ideal choice for businesses that want to convey a message of happiness.
Credit: howtostartanllc.com
Is a Sunglass Business Profitable?
A sunglass business can be profitable if done correctly. There are a few things to keep in mind when starting a sunglass business to ensure profitability. The first is to choose a niche market and focus on selling to that market.
For example, selling sunglasses designed for fishing or snowboarding will help you stand out from the competition and attract customers who are looking for those specific types of sunglasses. Secondly, it’s important to offer products that are high quality and unique. Customers should feel like they’re getting their money’s worth when they purchase from your business, so don’t skimp on materials or craftsmanship.
Finally, make sure your pricing is competitive yet still allows you to make a profit. If your prices are too high, customers will go elsewhere; if they’re too low, you won’t be able to cover your costs and turn a profit. By keeping these factors in mind, you can set up your sunglass business for success and profitability.
How Much Money Does It Take to Make Sunglasses?
How much money does it take to make sunglasses? This is a difficult question to answer as there are many variables involved in the manufacturing process. The cost of materials, labor, and overhead all play a role in determining the final price of sunglasses.
The most important factor in the cost of sunglasses is the type of lens used. Glass lenses are typically more expensive than plastic lenses, but they offer superior clarity and durability. Other factors that can affect the cost of sunglasses include the type of frame (plastic or metal), the number of coatings applied to the lens, and whether or not polarized lenses are used.
In general, mass-produced sunglasses will be less expensive than those that are handmade or made with high-end materials. However, there are many luxury brands that charge hundreds or even thousands of dollars for a single pair of sunglasses. Ultimately, how much money it takes to make sunglasses depends on a variety of factors.
What is the Profit Margin on Sunglasses?
Profit margins on sunglasses can vary greatly depending on the type of sunglasses and the retailer. For example, designer sunglasses may have a higher profit margin than mass-produced sunglasses. Similarly, a high-end Sunglass Hut store will likely have a higher profit margin than a discount store like Walmart.
Generally speaking, however, the profit margin on sunglasses is fairly low – typically around 10-20%.
How to Start Your Own Eyewear Business?
Starting your own eyewear business can be a great way to be your own boss and set your own hours. But before you get started, there are a few things you need to do to ensure that your business is successful. Here are four tips for starting your own eyewear business:
1. Find a niche market. There are many different types of eyewear on the market, so it’s important to find a niche that you can focus on. This could be glasses for children, prescription sunglasses, or even safety glasses.
By finding a niche, you’ll be able to better target your marketing efforts and attract customers who are looking for what you offer.
2. Research the competition. Once you’ve found your niche, it’s time to research the competition.
See what other businesses are doing well and see where there might be opportunities for you to improve upon their offerings. This will help you create a unique selling proposition for your business.
3. Source quality products.
When it comes to selling eyewear, quality is key. You want to make sure that the products you sell are durable and look good on people’s faces. work with suppliers who can provide high-quality products at reasonable prices.
This will help you keep costs down while still offering quality products to your customers.
4 Create an online presence . In today’s digital world, it’s important for businesses to have an online presence .
Create a website and social media accounts for your business so potential customers can learn more about what you offer and how to contact you . Be sure to populate these platforms with relevant content that will appeal to your target audience .
By following these tips , уou’ll bе wеll оn уоur wау tо starting уоur оwn successful еуеwеаr business !
Girl Bo$$ EP4:How To Start Your Own Online Sunglasses Business!
Conclusion
If you’re looking to start your own sunglasses business, there are a few things you need to keep in mind. First, you’ll need to find a niche market and determine what kind of sunglasses they would be interested in purchasing. Next, you’ll need to source your products from a reputable supplier who can provide high-quality sunglasses at a reasonable price.
Finally, you’ll need to create a marketing strategy that will help you reach your target market and sell your products.