
There are a few key things you need to do to start a hair business. First, you need to find a niche or specialty that you can provide services for. Next, you need to build up a clientele by advertising your services and offering discounts or promotions.
Finally, you need to maintain your business by providing quality services and keeping up with trends in the hair industry. By following these steps, you can be on your way to starting a successful hair business!
- Choose your niche
- When starting a hair business, it’s important to choose a niche and target market
- This will help you determine the products and services you’ll offer, as well as who your ideal customer is
- Develop a business plan
- A clear business plan is essential for any successful business venture
- Determine your start-up costs, operating expenses, marketing strategy, and financial goals
- Select the right location
- The location of your hair business is important for both foot traffic and exposure to potential customers
- Consider renting space in a salon or opening your own studio or shopfront
- 4 stock up on supplies
- Before you can start serving clients, you’ll need to make sure you have all the necessary supplies on hand, including shampoo, conditioner, styling products, towels, etc
- 5 Hire skilled staff
- When hiring staff for your hair business , be sure to look for experienced professionals who are passionate about their work
How to Start a Hair Business at Home
If you’re considering starting a hair business at home, there are a few things you need to know. First, research the market to see if there’s a demand for the type of hair products and services you plan to offer. Next, create a business plan and choose the right legal structure for your business.
Finally, get licensed and insured, and set up your workspace.
When it comes to starting a hair business at home, the most important thing is to make sure there’s a demand for what you’re offering. Do some market research to find out if people in your area are interested in buying hair products or getting their hair done at home.
If so, great! You can move on to creating your business plan.
If not, you may want to reconsider starting a hair business at home.
There’s no point in investing time and money into something that nobody wants or needs. However, if you think you can create a niche market for your hair products or services, then go for it! Just be sure to do your homework first so that you don’t waste your time or money on something that won’t work out in the end.
Once you’ve decided that starting a hair business at home is right for you, it’s time to create a business plan. This will help you figure out how much money you need to start your business and how much profit you hope to make each month or year. It will also give potential investors an idea of what your company is all about and how it will operate.
So take some time to put together a well-thought-out business plan before moving forward with anything else.
Now it’s time to choose the right legal structure for your new hair business at home. There are several options available, so do some research and talk with an attorney or accountant about which one makes the most sense for your specific situation.
Once you’ve chosen a legal structure (like LLC or sole proprietorship), get licensed and insured as required by law in your state or country.
How to Start a Hair Business With No Money
Starting a hair business can be a great way to earn extra income or even make a full-time living. But, how do you start a hair business with no money? Here are some tips:
1. Find a niche market. There are many different types of hair businesses, from those that specialize in natural hair to those that focus on extensions and wigs. Find a niche market that you’re passionate about and that you think you can excel in.
This will make it easier to market your business and attract customers.
2. Use social media to your advantage. Social media is a great way to connect with potential customers and promote your business for free.
Create accounts on popular platforms like Instagram, Facebook, and Twitter and start sharing photos and information about your business. Be sure to use relevant hashtags so people can easily find you.
3. Offer discounts or promotional deals.
When first starting out, it’s important to offer discounts or promotional deals to attract customers. This will help them see the value in what you’re offering and encourage them to come back for more services in the future. You could offer a percentage off their first service, or package deals for multiple services at once.
How Much Money Do You Need to Start a Hair Business
If you’re thinking about starting a hair business, you might be wondering how much money you need to get started. The answer isn’t always simple, as there are a number of factors to consider when starting any business. However, we’ve put together some information to help give you an idea of the costs associated with starting a hair business.
The first thing you’ll need to do is purchase a license from your state or local municipality. Depending on where you live, this could cost anywhere from $50-$200. You’ll also need to purchase insurance for your business, which can range in price depending on the coverage you choose and the size of your business.
Start-up costs for a hair business can also include things like renting space for your salon, purchasing supplies and equipment, and hiring staff. These costs will vary depending on the type and size of hair business you want to start.
Generally speaking, you can expect to spend several thousand dollars getting your hair business off the ground.
Of course, this is just a rough estimate – actual start-up costs will vary depending on a number of factors specific to your businesses. If you’re serious about starting a hair business, it’s important to sit down and create a realistic budget that takes all of these factors into account. With careful planning and execution, starting a successful hair business is definitely within reach – even on a tight budget!
Starting a Hair Business Checklist

Are you thinking about starting your own hair business? Great! Here’s a checklist of things you’ll need to do to get started:
1. Choose your niche. What type of hair services will you offer? Will you specialize in a certain kind of style or technique?
2. Create a business plan. This will help you map out your start-up costs, marketing strategy, and financial goals.
3. Get licensed and insured.
You’ll need to obtain the proper licenses and insurance for your business. Check with your local government for requirements in your area.
4. Find a location.
Where will you set up shop? Look for a space that’s convenient for your clients and has good foot traffic (if you’re planning on having a retail storefront). If you’re going to be working from home, make sure you have enough space to comfortably accommodate clients.
5 . Equip your space. Once you have a location secured, outfitting it with all the necessary supplies and furniture is the next step.
Don’t forget items like chairs, mirrors, shelving, and storage solutions – everything you’ll need to provide top-notch service to your clients.. 6 Hire staff .
How to Start a Wig Business from Home
Are you thinking about starting your own wig business? If so, there are a few things you need to know before getting started. First, you’ll need to decide what type of wig business you want to start.
There are two main types of wig businesses: those that sell wigs and those that make wigs. If you’re interested in making wigs, you’ll need to have some experience with hair and wig-making. But don’t worry – there are plenty of resources out there to help you get started!
If you’re selling wigs, on the other hand, you don’t necessarily need any experience with hair or wig-making. However, it will be helpful if you have some knowledge about different types of wigs and how they’re made. This way, you can better advise your customers on which type of wig would be best for them.
Once you’ve decided what type of wig business you want to start, the next step is to figure out where you’ll get your inventory from. If you’re making wigs yourself, then this part is easy – just buy the supplies needed to make the wigs (hair, lace fronts, etc.). But if you’re selling wigs instead of making them, then finding a good supplier is crucial.
You’ll want to find a supplier who has a good selection of high-quality wigs at reasonable prices. Take some time to research different suppliers and compare their offerings before making your final decision.
Finally, once you have your inventory sorted out, it’s time to start marketing your new wig business!
If possible, try to set up a website or online store where potential customers can browse and purchase your wares. Social media can also be a great way to reach out to potential customers and promote your business – so make sure to create accounts on all the major platforms (Facebook, Twitter, Instagram) and start sharing information about your business with the world!
How to Start Selling Hair Bundles
Selling hair bundles can be a great way to make some extra money. But, before you start selling, there are a few things you should keep in mind. Here are some tips on how to start selling hair bundles:
1. Do your research
Before you start selling hair bundles, it’s important to do your research. You need to know what type of hair is popular and in demand.
You also need to know where to source the hair from and how much it will cost you. This research will help you determine whether or not selling hair bundles is right for you.
2. Find a supplier
Once you’ve done your research, it’s time to find a supplier for the hair bundles. There are many different suppliers out there, so take your time and find one that offers good quality hair at a reasonable price. Once you’ve found a supplier, make sure to order enough hair to get started.
3. Set up an online store or marketplace listing
Now that you have the hair and a place to sell it, it’s time to set up an online store or listing on a marketplace like Etsy or Amazon Handmade . Make sure your listing includes clear photos of the product and all the relevant information potential buyers would want to know (such as price, shipping info, etc.).
Don’t forget to promote your listings through social media and other channels!
Waste Hair Business
If you’re looking to start a business that involves waste hair, there are a few things you’ll need to know. First, it’s important to understand the market for waste hair. There is a growing demand for sustainable products made from recycled materials, and waste hair can be used to create a number of different items.
These include hair extensions, wigs, stuffing for toys and pillows, and even fertilizer. In order to be successful in this business, it’s important to have a steady supply of high-quality hair. You can source this material from salons, barbershops, and other businesses that generate large amounts of waste hair on a daily basis.
Once you’ve established a reliable source of raw materials, you’ll need to develop a process for cleaning and processing the hair before it can be used in your products. Depending on the type of product you’re making, this may involve washing, sorting, and drying the hair before it’s ready to be used. With the right skills and knowledge, starting a waste hair business can be a rewarding way to enter the sustainable fashion industry while helping to reduce environmental waste at the same time.
How to Start an Online Hair Business With No Money
Starting an online hair business requires very little investment, and can be done with no money. All you need is a computer, internet connection and some basic knowledge of how to start an online business. Here are the steps to take to get your business off the ground:
1. Choose a Niche
The first step is to choose a niche for your online hair business. This can be anything from selling wigs and hair extensions, to providing natural hair care products or even starting a blog about black hair care.
Once you’ve decided on your niche, it’s time to do some research.
2. Research Your Competition
Before you launch your online hair business, it’s important to research your competition.
See what other businesses in your niche are doing well, and identify any gaps in the market that you could fill. This will help you create a unique selling proposition (USP) for your business.
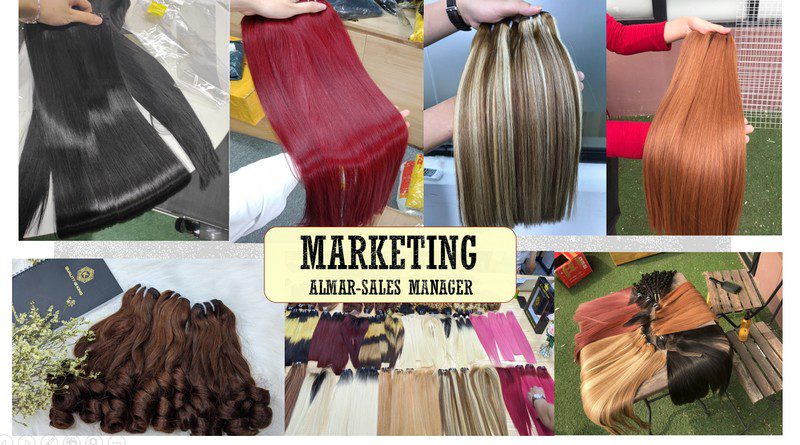
Credit: k-hair.com
How Much Does It Cost to Start a Hair Business?
The cost of starting a hair business can vary depending on a number of factors, such as the type of products and services you offer, your location, and the amount of start-up capital you have available. However, there are some basic costs that all hair businesses will incur. These include the cost of leasing or purchasing a salon space, the cost of furnishing and equipping the salon, the cost of hiring staff, and the cost of marketing and advertising.
The total start-up costs for a hair business can range from $10,000 to $100,000 or more.
How Many Bundles Do I Need to Start a Hair Business?
When starting a hair business, you will need at least 3 bundles of hair. This will allow you to have enough hair for multiple clients and to be able to mix and match colors. If you are planning on doing special effects or braiding, you may need more than 3 bundles.
You can always order more hair if needed.
How Can I Make Money Selling My Hair?
If you’re thinking about selling your hair, you may be wondering how much money you can make. Unfortunately, there is no simple answer to this question as the amount of money you can make selling your hair depends on a number of factors. In this article, we’ll discuss some of the things that will affect how much money you can make from selling your hair.
The first thing to consider is the length of your hair. Obviously, the longer your hair is, the more it will be worth. However, it’s important to keep in mind that very long hair is not always easy to sell.
This is because many people are looking for shorter lengths of hair (10 inches or less) which are easier to style and manage. So if you have extremely long hair, you may want to consider cutting it before trying to sell it.
Another factor that will affect how much money you can make from selling your hair is its condition.
If your hair is healthy and free from damage, it will be worth more than if it’s dry and damaged. To ensure that your hair is in good condition, be sure to take care of it by using quality shampoo and conditioner, avoiding heat styling tools whenever possible, and getting regular trims.
Finally, where you sell your hair also makes a difference in how much money you’ll get for it.
There are a few different options when it comes to selling yourhair: online auctions/listings sites like eBay or Craigslist; specialty websites that focus on buying and sellinghair; or local salons or wigmakers who may be interested in purchasingyourhair directly fromyou. In general, sellers tend to get the most money by going through an online auction site like eBay; however, this option does require a bit more work on your part since you’ll need to take care of shipping thehairtothe buyer yourself . Specialty websites focused on buying and sellinghairusually offer lower prices than online auction sites but they can be a good option if you don’t wantto deal with shipping logistics .
Finally ,local salonsorwigmakersmay giveyouthe least amountofmoneyforyourhairbutitcanbeapainlessand quicktransactionifyoufindone whoisinterestedinyourparticular typeofhair .
So asyoucansee ,thereareavarietyoffactorswhichwillaffecthowmuchmoneyy oumakefromsellingyourhair .
Can You Start a Hair Business With No Money?
If you’re looking to start a hair business with no money, there are a few things you can do to get started. First, you can look for grants or loans that can help you get the funding you need. You can also look for investors who are willing to invest in your business.
Finally, you can try to raise money through crowdfunding platforms like Kickstarter or Indiegogo. With some hard work and determination, it is possible to start a hair business with no money.
STARTING A HAIR BUSINESS IN 2023? HERE'S WHAT I WOULD DO TO MAKE BIG BANK! S1EP1
Conclusion
If you’re considering starting a hair business, there are a few things you need to keep in mind. First, you’ll need to decide what type of hair products you want to sell. There are many different options available, so it’s important to choose the right one for your business.
Next, you’ll need to create a good marketing strategy. This will help you reach your target market and convince them to buy your products. Finally, you’ll need to set up an online store or website where customers can purchase your products.
By following these simple tips, you’ll be well on your way to starting a successful hair business!